


Tutorials > Photoshop > Layout Slicing
Learn how to slice a layout made in Photoshop.
If the images on this page do not appear, please click here.
1. First of all, you will need to find the image or layout that you would like to slice. I'm going to use one from the Professional Web Host Layout tutorial.
2. Using the slice tool, create your slices that you would like to use.
Things to consider before you slice:
You really need to take into consideration where and what type of content you will be adding to your design. For instance if you have a large section in the middle that will be used as an iframe then you will need to make a slice for this. If you have a box that you would like to add text to then make a slice where the content will go or you could slice the entire box and add cellpadding to it in order to get the content lined up right. (If there is no padding for the content, text will be hard to read when its touching the border.) Also name your slices accordingly by right-clicking on the slice and going to edit slice options, as this will help you identify them later when you are editing the html file.
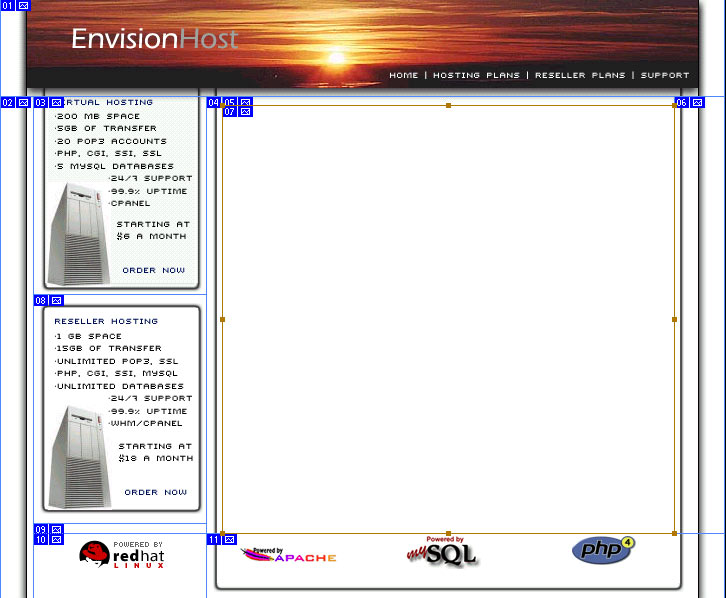
To see where I made my slices, click on the image below.
3. Now go to File > Save For Web (Alt+Shift+Ctrl+S). Tweak the compression settings for each slice. For the best compression, use .jpg file extensions for images with lots of color, and .gif file extensions for line art images(few colors).
4. Click on the save button to save. Make sure "HTML and Images" is selected for "Save as Type".
5. Next open the html file that Photoshop just created for you. To add some content to a slice look for code similiar to the following:
<td><img src="images/slicedimage.gif" width="450" height="300"></td>
Replace it with:
<td background="slicedimage.gif" width="450" height="300"></td>
Then add your content to the slice as so:
<td background="slicedimage.gif" width="450" height="300"><img src="someimage.gif"><font face="verdana" size="1">text textContent Goes Here</font>
</td>
You may also find that in order for the page extend as your page's content increases, you will need to make border images the background image in that image's <td> attribute as done above for content. (I had to do this for slices 2, 4, and 6. Click on the snapshot in step two to see where these slices are.)


