


Tutorials > Photoshop > Professional Web Host Layout
Learn how to create a professional layout for a web host.
If the images on this page do not appear, please click here.
This is no doubt my longest tutorial yet, so I suggest you save this every few minutes incase you loose it. (ie. computer freeze, which everyone hates)
1. First of all, you will need to find all of the images that you are going to use for your layout. This way, creating your page all in Photoshop will go much faster. For the purpose of this tutorial for a web host layout, I'm using pictures from multiple google image searches. When creating the "real thing", I would avoid using other people's images if possible. If you do for some images (ie. servers, which is popular), please post its source on your page.
Click here for the images I'm going to use.
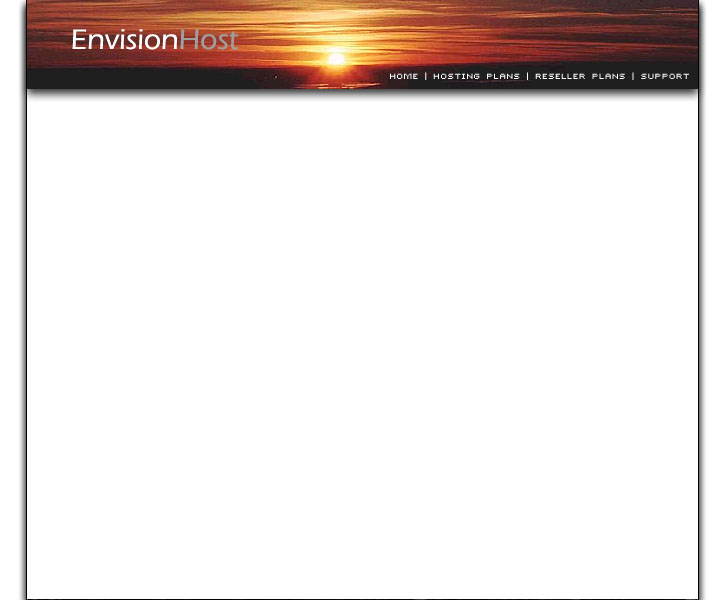
2. Create a new 725x600 image in photoshop with a white background.
3. Create a new layer. Now, using the rectangular marquee tool, create a selection filing the entire image while leaving a small area on both sides. Fill the selection in white.
(Click each snapshot for a larger view.)
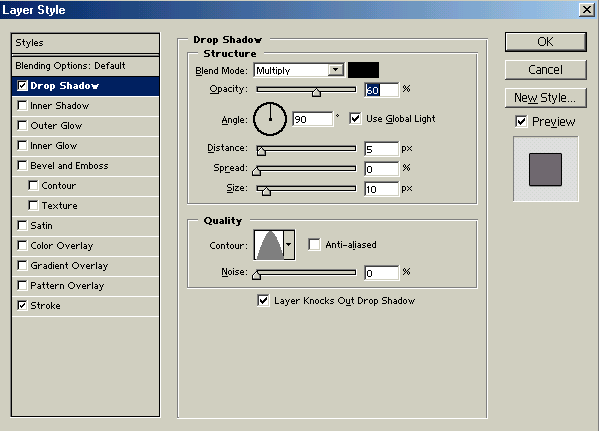
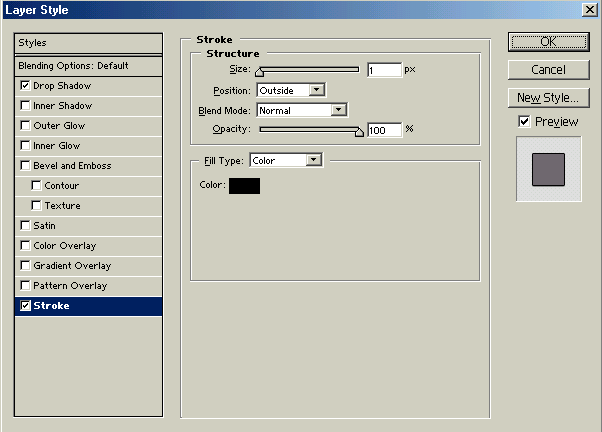
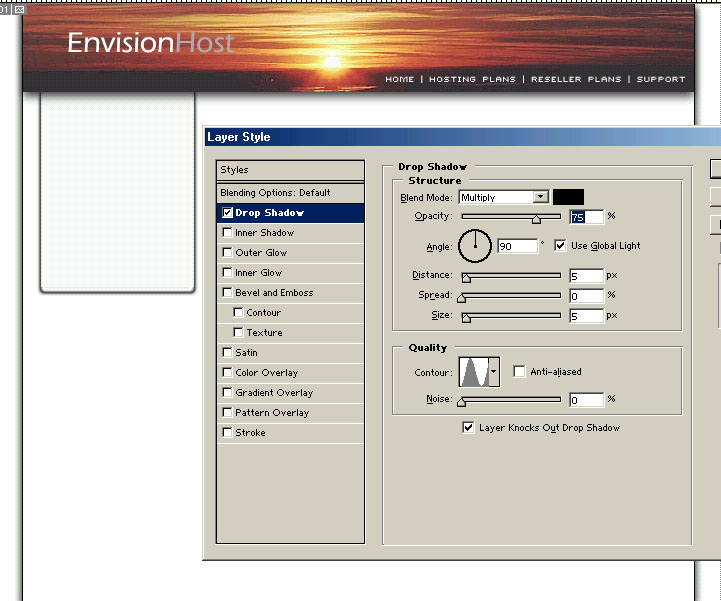
4. Right-click on the layer and select Blending Options. Use the following settings for Drop Shadow and Stroke.
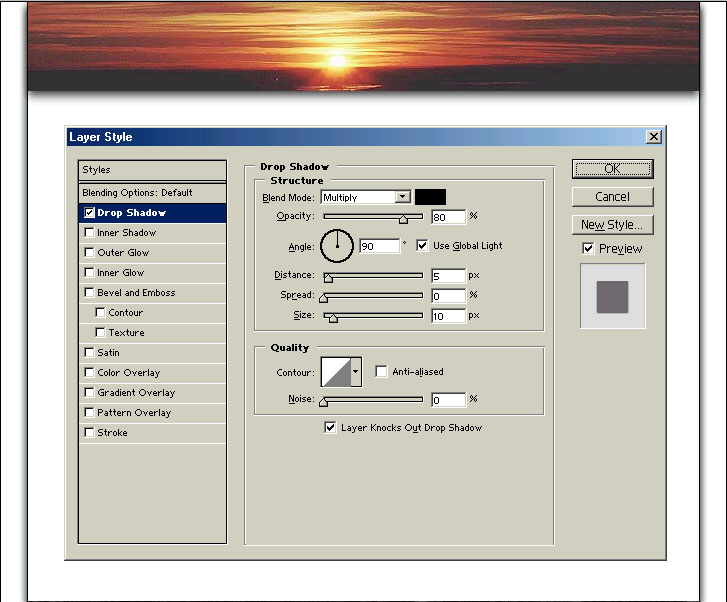
5. Find the header that you are going to use, and place it in a new layer. Move the image all the way to the top and center it inside the box you just made. Right-click on this layer and select Blending Options. Use the settings in the image for drop shadow.
6. Now is a good time to add your text to your top banner. I added the name of the host and navigation in the bottom right hand corner.
7. Click on the layer that includes the box that you made in step 3 and create a new layer. Now, using the rectangular marquee tool, make a selection large enough to place the hosting plans and server picture in. Fill the selection in white and right-click on the layer and choose Blending Options. Use the settings in the image for a Drop Shadow. You will notice that the top side is not filled in black, therefore move the box up underneath the header to hide it. If you don't understand, look at the picture.
Affiliates


Resources
