


Tutorials > Photoshop > Realistic iPod Page 2
3. Next work will begin on the screen display items. In order to make this iPod as realistic as possible, you will need to download Chicago, the font used on the real iPod interface. If you are using an Apple computer, use should already have this font. Unzip the file and place its contents in the Fonts folder. To get to this, go to My Computer and select your hard drive. Then select the WINDOWS folder and then the fonts folder. In this new window, go to File > Install New Font. Find the files and import them. In order for Photoshop to recognize the new fonts, you will have to restart Photoshop. Save any documents that you have open, then close and restart Photoshop. If the Chicago font is still not recognized by Photoshop, you will have to restart your computer.
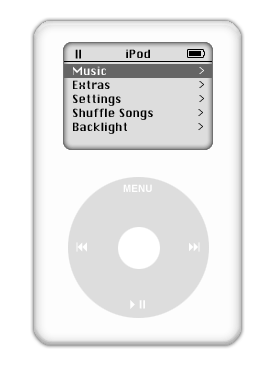
4. Now that the Chicago font is installed, type iPod on the iPod screen. Then using the Line Tool, create a line directly below this that expands the full width of the iPod's screen. Next create the menu options below this line.
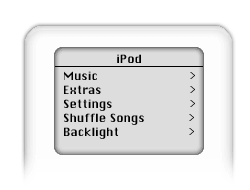
5. Next it's time to create the famous iPod clickwheel. Create a new layer titled Clickwheel, then using the Elliptical Marquee Tool, create a selection below the screen while holding down the Shift key to create a perfectly round circle. Fill the selection in with color #dddddd. Another button needs to be created for the center of the clickwheel. So create a new layer titled Clickwheel Button. Using the Elliptical Marquee Tool again, create a selection in the center of the clickwheel and fill it in white as shown below.
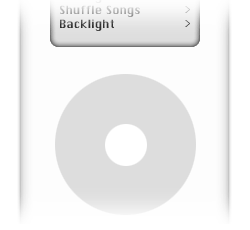
6. The clickwheel text needs to be added. Using Arial font, type MENU towards the top of the clickwheel. For the rest you will need to use Webdings font. To get the buttons created below, use 9 for the backwards button, 4 for play, and ; for Pause. For the Forward button you will need to duplicate the backwards button and go to Edit > Transform > Flip Horizontal. Then just move this layer to the other side of the clickwheel. Also go ahead and add an optional pause button on the iPod screen.
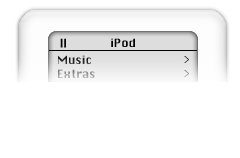

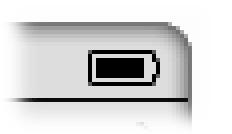
7. The last major item that the iPod is still missing is the battery level indicator on the screen. Create a new layer called Battery Shape. Using the Rectangular Marquee Tool, create a selection of the shape of the base of a battery. Then in the tool options bar at the top of the screen, select the icon for Add to Selection. On the right side of the battery shape create another selection for the top of the battery. Then fill the selection in with #dddddd. Next, right click on this layer and select Blending Options. Add a 1px black stroke, leaving all of the other settings alone. To create the level indicator, create another layer titled Battery Life. Zoom in to about 1200% and using the Rectangular Marquee Tool, create a selection inside of the shape with one or two pixels of the screen background around it. Fill it in black.
8. The realistic iPod is finally complete. If you want to you can use the Rectangular Marquee Tool and create a box over one of the menu items on the screen. Then you would have to change the font color for the chosen line to white.
Want an iPod? Get one for FREE!


