

Tutorials > Photoshop > Photoshop Interface
If the images on this page do not appear, please click here.
This tutorial, geared towards Photoshop novices, gives an overview of the many interfaces in Photoshop. You will practice working with the toolbox, palettes, the option bar, and tool presets.
Toolbox
Photoshop's toolbox contains all the tools available to you. The toolbox contains fly-out or sub menus that can be viewed by holding your mouse button down on a tool. Whenever you see a little arrow on the bottom right of the tool in the toolbox, it means that there are additional tool choices.
Finding the tool you would like to use can be difficult if you aren't familiar with the toolbox. View all the fly-out menus in the toolbox. In the image in the link, you will notice letters beside each tool. The letter to the right of most of the tools is the shortcut key that enables you to access that tool quickly.
![]() This
button at the bottom of the toolbox allows you to switch to Image Ready
conveniently. With this button, you do not have to save your current document
then open it back up in Image Ready.
This
button at the bottom of the toolbox allows you to switch to Image Ready
conveniently. With this button, you do not have to save your current document
then open it back up in Image Ready.
Palettes

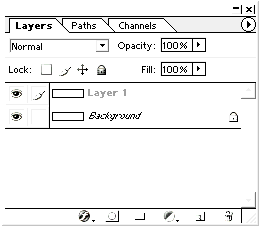
In Photoshop, there are many palettes or windows, which are used repeatedly during the editing process. Each palette can be made visible by going to Window > palette name. Those already with a check mark by them mean they are currently visible. They can also be turned off using this same method.
Most of the palettes are nested or grouped with many items. Each item can be removed from the group by clicking and dragging its tab to a desired location on your screen. A palette's size can be adjusted by clicking and dragging on the bottom right corner of the palette.

At the top right corner of the screen, there is a palette well, which is pictured above. Palettes in this well can only be viewed on at a time, however they can free up screen space, which can be very helpful on computers with small resolutions. Palettes can be added to this well by clicking and dragging on a palette's tab to the well or by clicking on the little triangle in the top right hand corner of the palette and selecting Dock to Palette. To remove an item from the well, click and drag its tab out of the well.
In Photoshop 7 and above, workspace configurations can be saved. To save a workspace, which includes the position of all open palettes and movable dialogs, go to Window > Workspace > Save Workspace. A window will then appear asking you to name the workspace before you save it. An unlimited number of workspace configurations can be saved, possibly setting up custom workspaces for particular types of work.
Each palette contains an options menu, which can be accessed by clicking on the little arrow at the top right hand corner of the palette. Palettes also contain a ton of context menus. Experiment by right clicking on just about anything and you'll get a menu of relevant commands.


