

Tutorials > Photoshop > Glass Button Page 2
If the images on this page do not appear, please click here.
5. The last blending option that will be used is a Stroke. Set the stroke width to 1 px and change the stroke color to #E2E2E2.
 6. The only thing that needs to be added now is CS's trademark feathers.
First you will need to download
the feather image. Open the image in Photoshop and you'll notice
that the feathers are too large for the button created, therefore the image
size will need to be reduced. For this tutorial, we want the feathers to
touch both the top and bottom borders. However this height is unknown at
the moment. In order to find out the height that the image with the feather
in it should be reduced, grab the Measure Tool. In order
to get the most accurate measurement, zoom in to about 400%.
Click directly below the top stroke the drag the mouse to directly above
the bottom stroke. At the top of the screen below the navigation, the desired
height will appear. The height of my measurement is 82 pixels.
7. If you have not done so already, open the CS feather image in Photoshop. Next resize the image to the height of the measurement received in the previous step. Then drag the feathers onto the document with the glass button and place it anywhere on the image that you would like to.


8. In order to make the feathers blend more with the button below it, add
a few blending options. Start off with an Inner Shadow
using the same one from step 3, only this time change the Opacity
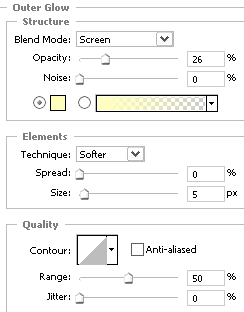
to 25%. Then add an Outer Glow.
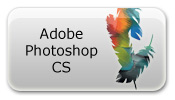
9. Finally add some text and your glass button with CS's trademark feathers
on it is now done!


