


Tutorials > Photoshop > Glass Button
If the images on this page do not appear, please click here.
Have you ever noticed the small icon in the taskbar when Photoshop CS is open? The icon has a glassy look and contains CS's trademark feather. In this tutorial you will learn how to create a similiar, but larger version of this icon.
Create a trendy glass button with Photoshop CS's feathers on it.
1. Start off by creating a new 175x100 document with a white background. Change the foreground color to #E2E2E2 then grab the Rounded Rectangle Tool and in the bar at the top of the screen, change the radius to 12. Then create a selection as shown below.

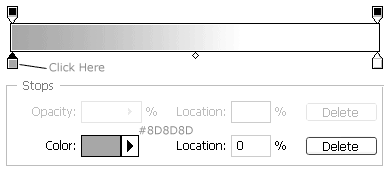
2. Next right-click on the newly created layer and select blending options. Change the Opacity to 50%. Select the Black to White gradient then click on the current gradient to bring up the Gradient Editor. The gradient is a bit too dark, so change the black in the gradient to #8D8D8D.
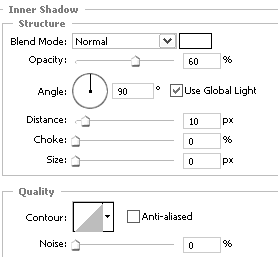
3. With the Blending Options window still open, select Inner Shadow. The Inner Shadow will create the glossy look for the glass button.
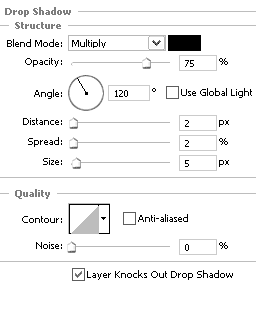
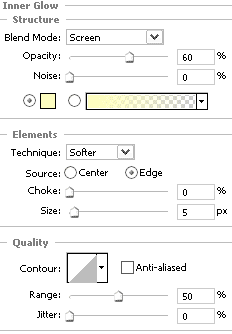
4. Next add a Drop Shadow and an Inner Glow.
PsPrint confidently offers online printing services at low price guarantee.


