


Tutorials > Photoshop > Studio Reflection
Learn how to turn ordinary images into professional studio shots with simple reflections.
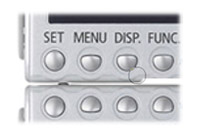
1. Start off by finding any of the images that you would like to use in the studio shot. I am going to use and front and back view of the Canon PowerShot S400, my new camera. Click here for the front view and click here for the back view.
2. Next create a new 500x500 image with a white background. Then open one of the images in Photoshop; I'm going to start with the back view. Using the Move Tool, drag the image onto a new layer on the new document.
3. Next duplicate the current layer by going to Layer > Duplicate Layer. To begin creating the reflection needed in order to pull off this effect, go to Edit > Tranform > Flip Vertical. Then use the Move Tool move it below the original image. If you used the same images that I did you will notice that a small white line will need to be removed because the images overlap too much. To do this, grab the Eraser Tool, zoom in, and remove the white line. Adjust the Brush size as needed.

4. The area that will be reflected is too large. So grab the Rectangular Marquee Tool and select the area to take away, then go to Edit > Cut. Finally its time to make the reflection. To do this, grab the Gradient Tool and double-click on the current gradient in the Options Tool bar at the top of the screen to bring up the Gradient Editor. Change the colors in the gradient so that it goes from White to Transparent. Then click OK to get out of the Gradient Editor. Then make sure your Gradient Tool Options bar has the following settings.

Affiliates


Resources
