

Tutorials > Photoshop > Rollover Buttons
Learn how to create popular button rollovers using Image Ready.
If the images on this page do not appear, please click here.
1. In Photoshop, create two buttons of the same size for the rollovers. The two buttons have to be different in some way, even a text color change will do.


2. Save the images in Photoshop and open them in Image Ready or just click the Photoshop to ImageReady button(the last button in the toolbox). Make sure both images are in the same image or document on a separate layer. If they aren't, Ctrl+ click on the layer in either image, then go to Edit > Copy, then click on the other image or document and go to Edit > Paste.
3. Now disable the text and/or button for the over state, the image that will be seen when the mouse rolls over the image.

4. In the rollover window click on the create new rollover state button, which is next to the trash can. If the window isn't enabled, go to Window > Rollovers.
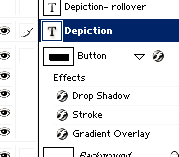
5. Now click on the over state layer in the rollover window. Then go back to the layers palette and click the eye next to the button and text layer for the over state button/image to enable them and click on the eye next to the layers for the normal state, the state in which the mouse is not over the image, to disable them.
6. Next click on the Internet Explorer button in the toolbox to preview the rollover. If you're satisfied with the result, save the rollover. To save the rollover, go to File > Save Optimized As (Ctrl+Shift+Alt+S). In the window that comes up, make sure the Save As Type field is set to HTML and Images.
Here are 10 great tutorials on how to create website buttons.


