

Tutorials > Photoshop > Postage Stamp
Learn how to use a brush pattern in order to create a realistic postage stamp.
1. Start out with a new image and fill the background with any color. Next select the Rectangle Tool and in the options bar select the shape layers setting. Make sure that the foreground color in the toolbar is set to white and create a shape for the stamp as shown below.

2. With the stamp shape layer still active in the Layers Palette and the Rectangle Tool still active on the Toolbar change the setting in the options bar to Paths. The paths button is the middle one. 
3. Using the Rectangle Tool still active, create a selection path just inside of the current one on the same layer.
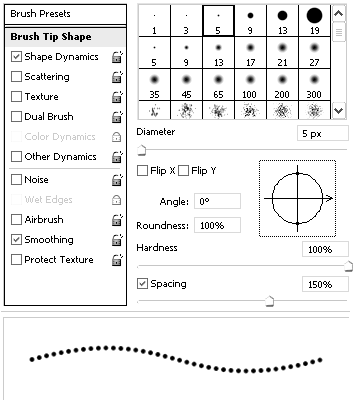
4. Now that the path is selected, select the Eraser Tool in order to use it as a Brush Preset to create the holes around the edges of the stamp. With the eraser tool still active, open the Brushes palette. Use the following Brush Tip Shape settings.


