


Tutorials > Photoshop > Speech Bubble Header Page 2
Create a clean web 2.0 style header containing a speech bubble for your website.
4. We will now create a speech bubble that will go off of the Blog link. Create a new layer then select the Rectangular Marquee Tool. Create a selection for the main part of the bubble. After creating the selection, DO NOT fill it in just now. Instead go to Select > Modify > Smooth. Use a setting of 2-3 px or more and click OK. Next select the Polygonal Lasso Tool. Make sure that the second icon in the tool options bar (Add to selection) is selected. Create the selection and fill it in black as shown below.

5. Now that the bubble has been created, lets add some style to it. Right-click on the current layer and select Blending Options. Add an Inner Shadow, Satin, and Gradient Overlay. You may continue to enhance the bubble by adding a very subtle Drop Shadow if you'd like to.
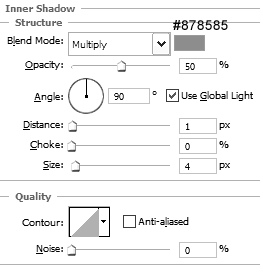
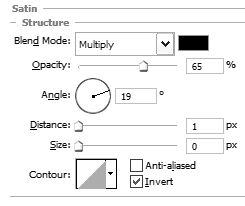
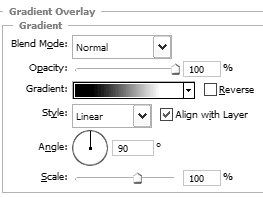

6. Finally, go ahead and add a graphic and some text. You may use the same tickets graphic that I used if you'd like to.
