Tutorials > Photoshop > Halftone Clouds
Learn how to use the halftone pattern filter to make a cool effect.
If the images on this page do not appear, please click here.
1. Create a new image of any size then press D on your keyboard to reset the colors.
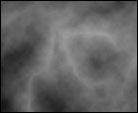 |
2. Go to Filter > Render > Clouds. Then go to Filter > Render > Difference Clouds. Repeat the difference cloud filter a few times until you are satisfied. |
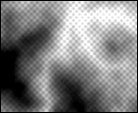 |
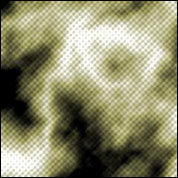
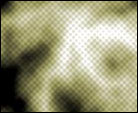
3. Let's add our pattern. So go Filter > Sketch >
Halftone Pattern. Now press Ctrl+F to repeat the process for more depth.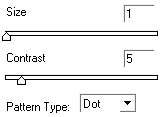 |
 |
4. Now press Ctrl+U on your keyboard to bring up the Hue/Saturation window. Check the colorize box and play around with the sliders until you get a color you like for the pattern. |
5. If you want the dots to pop out more, duplicate the current layer by dragging the layer to the new layer button. Then go to Filter > Stylize > Emboss. Change the Angle to 125, the Height to 3, and the amount to 50%. Finally go back to the layers palette and change the blend mode to Linear Light.